

In this Leiout tutorial you will learn how to create a feed that can be placed on different pages throughout a Trolley Web website.
Feeds can be used for a lot of different things. Here are some examples:
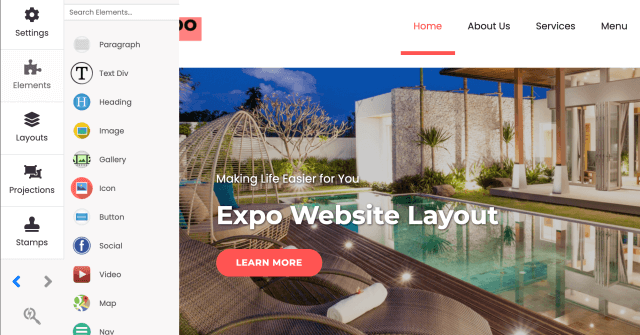
To add a feed to a page in the builder mode, you will need to add a new section with only one column in it to the page. Like a plugin, you will specify the number of columns in the feed template but the feed itself sits in a single column. Next you will drag the feed element into the column. One you have placed the feed element onto your page, you can either choose from a feed that has already been created or you can make a new feed. In order to create an entirely new feed you will have to navigate away from the builder mode and go back to the admin dashboard. You can build or find all of the feeds that have already been created by going to templates → feeds.
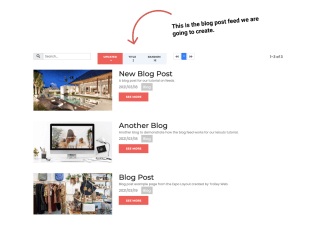
To create a feed, start by choosing Add Feed Template. Next you give it a name and a description. In this tutorial we are building a blog post feed that shows the three most recent blog posts.
When you create a new feed it comes pre-populated with a default layout. This can be replaced with new HTML specific to the feed that you want to build.
In a feed you build out the block (a block can be thought of like a plugin slide: check out the plugin tutorial to learn more about this).
For the blog post feed we start by building out the HTML for the block. This is the structure of the individual items or in this case, blog posts, displayed in the feed.
x
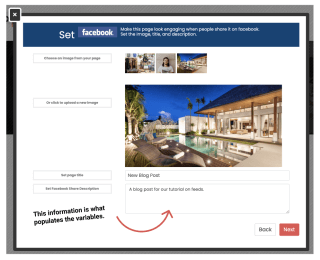
<div class="-feed-block row mb-5"> <div class="col-md-4"> <img src="{IMAGE_URL}" class="img-fluid -feed-image"> </div> <div class="col-md-8"> <h2 class="-feed-title">{TITLE}</h2> <p class="-feed-desc">{DESC}</p> <div class="-feed-date-tags mb-2"> <span class="mr-3">{DATE:Y/m/d}</span>{TAGS} </div> <a href="{URL}" class="btn btn-primary -feed-button">See More</a> </div></div>Just like a plugin you have variables to work with like the image and title variables. The way this works in the feed is that these variables are populated by what you place in the publish wizard for the page (check out our video on publishing if this sounds unfamiliar to you).
x
<div class="-feed-wrapper mt-3 position-relative"> <div class="-feed-header row mb-4"> <div class="col-md-3"> {SEARCH} </div> <div class="col-md"> {FILTER} </div> <nav class="col-md -feed-nav"> <ul id="lei-feed-nav-{FEED_ID}" class="pagination pagination-sm">{NAV}</ul> </nav> <div class="col-md-2 text-right pt-1"> <strong id="lei-feed-counter-{FEED_ID}" class="-feed-counter-count">{COUNT}</strong> </div> </div> {LOADER} <div id="lei-feed-blocks-{FEED_ID}" class="-feed-blocks mt-3">{BLOCKS}</div></div>The feed wrapper HTML defines what surrounds the feed blocks. In the case of this feed, there are search, pagination, and filter features.
The "feed empty" tab in the feed layout determines what the feed element will display if there are no blocks available. In this case it reads, "No recent blog posts."
To style this feed, bootstrap classes were added in the html such as col-md-4. Other styles were defined in a Blog Posts SASS file for this template. Remember, we placed the styles here because they are specific to this template. If we clone this template for a client’s website, you will make any further changes in the global css.
Now that we have created the feed template, we can return to our builder and place the blog post feed on the page.
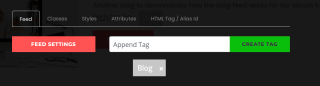
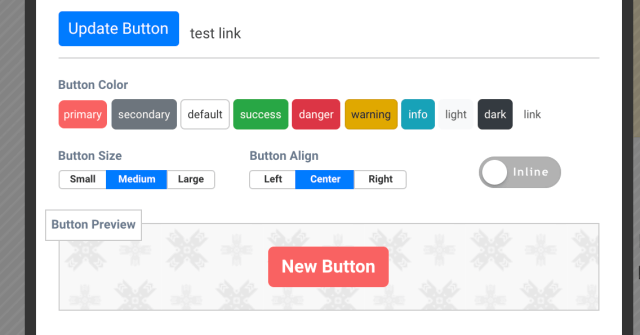
If you click the cog on the feed template you will notice two important features that we will work with to set up our blog post feed: appending a tag and feed settings.
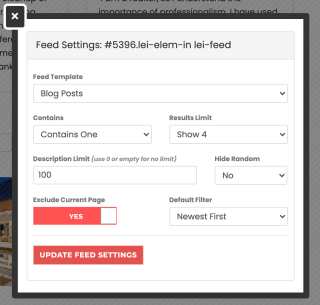
If you open the feed settings you will see that you first choose the template you want to use (in this example you would use the blog post template). You then have the following formatting options.
Next, for the feed to show any of the blog pages, you will need to append the tag, "blog" to it. This tells the feed to display any pages that have the tag “blog” appended to them. This tag was appended to each blog page during the publishing process.
Once this is completed, your blog post feed will be all set to go! Hopefully this tutorial has been helpful in understanding how to build feed templates and place them throughout a Trolley Web website.

In this Leiout tutorial you will learn how to publish a page. Dive into the publishing wizard feature of the lei out builder. Learn how to append tags to a page, set the facebook and google preview, preview a page, view the live version of a page an...
Let's learn about the Leiout Builder mode. Add containers, drag and drop elements, and change settings. These are the basic building blocks of building out a website. These flexible tools will allow you to create now, and change things up later.

In this Leiout tutorial, you will learn how to create hyperlinks and anchor links out of different page elements. You will also learn what happens to the elements when they are linked.
Let's learn how to create buttons in Leiout. Learn to add buttons, and customize their format through the Leiout button form. These are part of the basic building blocks of building out a website. These flexible tools will allow you to create now, a...