

In this Leiout tutorial you will learn how to use and set up the plugin element for flexible and easy to update components on a Trolley Web website.
Plugins are best used for more complicated layouts such as components that require more nested divs and wrappers. They are also great for making pre-set layouts in which all the user needs to do is fill in the corresponding inputs. It's follows the model of a wrapper and slides, where each slide is a predefined layout that repeats. It's useful for making customized layouts in addition to integrating with a javascript library that requires a certain markup in order to operate. Throughout this tutorial we will demonstrate a few examples of plugins. These examples will also be broken down.
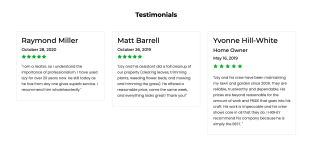
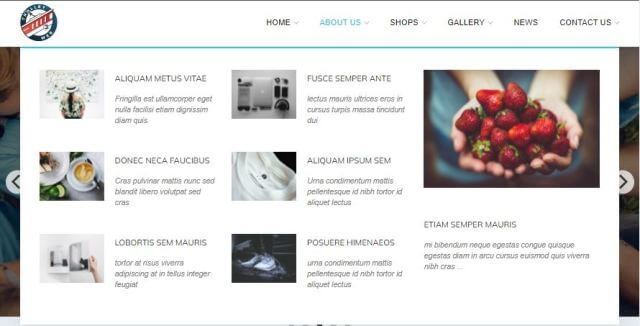
For this landscaping service website, we made a testimonials plugin so that the structure of the testimonial card was laid out and for further testimonials, we would simply have to fill in the information for the next card.
To build out this testimonials plugin, first you would add a section to your page. The entire plugin will sit in a single column. Next you drag and drop the plugin element. Next, you will need to open the plugin template. This can be found in the plugin element toolbar or if you hover over the plugin element cog on the handle.
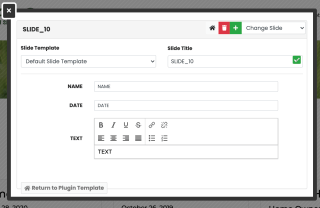
In this plugin each of these cards has a name, date, rating, and quote in it. Think of each of these cards as a separate plugin slide. When creating the slide template, you will want it to follow this design. In the slide template you will write out the HTML for a card that has name, date, rating, and a quote. In this particular example, we used the bootstrap card structure.
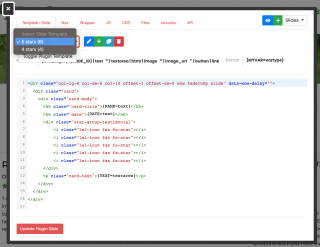
The HTML for the slide is:
x
<div class="col-lg-4 col-sm-6 col-10 offset-1 offset-sm-0 wow fadeInUp slide" data-wow-delay=""> <div class="card"> <div class="card-body"> <h5 class="card-title">{NAME=text}</h5> <h6 class="date">{DATE=text}</h6> <div class="star-group-testimonial"> <i class="lei-icon fas fa-star"></i> <i class="lei-icon fas fa-star"></i> <i class="lei-icon fas fa-star"></i> <i class="lei-icon fas fa-star"></i> <i class="lei-icon fas fa-star"></i> </div> <p class="card-text">{TEXT=textarea}</p> </div> </div></div>The outer most div specifies the column size based on screen size breakpoints. The class, slide, is added which allows you to edit the slide individually on the builder screen. Inside the card body the name, date, rating, and quote are mapped out.
Since this template is for all of the testimonial slides, you do not want to actually put any one person’s name, a specific date, or text here. Instead you will put placeholder variables which will be defined per slide.
Once you are done creating the slide template, make sure to press update plugin slide. Next you will want to define the structure of the wrapper. The HTML for the wrapper is:
x
<div id="-plugin-{UNIQUE_ID}"> <div class="row">{SLIDES} </div></div>If you take a look at your slides you will see all of the variables ready to be filled in based on what was created in the slide template.
Helpful Hint:
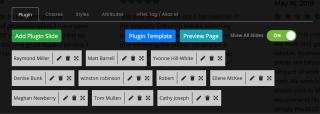
Say that you realize that not all of the testimonials are going to have 5 stars. You can go back to the plugin template and create another slide template so that you can choose if the testimonial has 4 stars or 5 stars. You can rename each slide template accordingly.
The number in parenthesis lets you know how many slides are using this template.
In order to change some of the styling you can add CSS specific for these slides under the CSS tab of plugin template. If you wrap the CSS in plugin-unique_id (which we specified in the wrapper HTML) this will ensure that the CSS only applies to slides in this plugin. The CSS for this plugin is:
#-plugin-{UNIQUE_ID}{ .card{ margin-bottom: 30px; .card-title{ font-size: 28px; margin-bottom: 10px; } .card-sub-title{ font-size: 20px; margin-bottom: 10px; } .card-text{ margin-bottom: 10px; } .date{ font-size: 16px; margin-bottom: 10px; } .star-group-testimonial{ display: flex; justify-content: flex-start; align-items: center; margin-bottom: 20px; i{ color: #01B13D; margin-right: 2px; } } } } In the plugin toolbar that you can see all of the slides and you can change their order, edit them, or delete them.
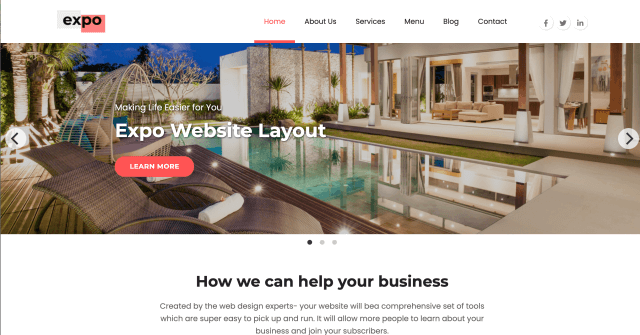
We can use plugins for all sorts of things. Here is a cool menu created on the expo template using a plugin.
This plugin is an example of when we would use the "text: multiple options" variable because in this menu we wanted to be able to put menu items in different categories.
In many Trolley Web templates, there is an owl carousel that shows logos of various clients. Looking at the template, you can see that the slide is simply made up of an image and the wrapper needs specific owl carousel classes as well as an id of plugin- unique_id, which will print out a unique number specific to this plugin. This can be appended to any name to make it unique.

HTML for slide:
x
<img src="{MYVAR=image|size:sm}" alt=""> HTML for wrapper:
x
<div class="owl-carousel clients-carousel" id="plugin-{UNIQUE_ID}"> {SLIDES}</div>This is a great example of a plugin with JS and CSS files appended to it. When you append a file, Leiout searches through files you have already uploaded.
You can also upload these files directly to this plugin instead of applying them to the entire site.
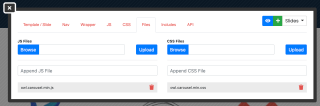
You can also place all other important javascript for this plugin in the JS tab. If you wrap the item in the unique-id variable then the plugin won't get initialized multiple times if you have multiple instances of it on the same page.
x
$(document).ready(function(){ $("#plugin-{UNIQUE_ID}.clients-carousel").owlCarousel({ autoplay: true, dots: true, slideBy: 1, loop: true, dotsEach: true, autoplayTimeout: 1000, responsive: { 0: { items: 2 }, 768: { items: 4 }, 900: { items: 6 } } });});One last piece we haven’t mentioned yet is the includes tab. This is where you can include your CDN for JS and CSS.
Plugins are a great tool and I hope this tutorial has provided a better understanding of them for you.


In this Leiout tutorial, you will learn about the different parts of the toolbar. You will learn about and how to use common toolbar options that all containers and elements have.
This article shows you how to install and display the Navik horizontal menu in Leiout!
This article explains how to create and use the mega menu functionality in Leiout navigation menus.
