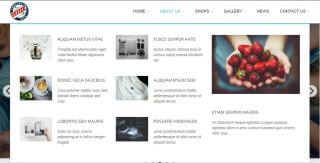

The navigation library Navik has support for mega menus, allowing the creation of large customizable dropdown menus.
These features are added into Leiout using frames.
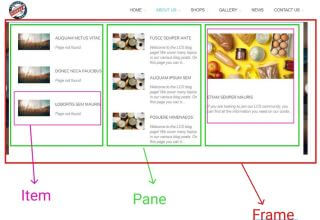
Frames refer to each individual large dropdown menu, and Panes refer to created subsections in each frame. Panes are created from pane templates, allowing for code reuse.
For the following in the admin/navigation route, either edit the default navigation menu or add an additional menu.
Wrapper Section
Once this menu is created the wrapper needs to have the class navik-mega-menu telling Navik to use mega-menu features
Below is an example of the wrapper section of a mega menu navigation menu.
x
<div id="lei-main-nav" class="navik-header header-shadow navik-mega-menu viewport-lg" style="margin-top: 0px;"> <div class="container"> <!-- Navik header --> <div class="navik-header-container"> {NAV:brand} <!-- Burger menu --> <div class="burger-menu"> <div class="line-menu line-half first-line"></div> <div class="line-menu"></div> <div class="line-menu line-half last-line"></div> </div> <!--Navigation menu--> <nav class="navik-menu menu-caret submenu-top-border"> <ul>{}</ul> </nav> </div> </div></div>Menu Section
The menu tab stays similar to the default Navik menu section. All of the mega-menu functionality is contained by the frames that are pulled in with the {-ITEMS-} variable
Code example below:
x
<li class="dropdown_menu"> <a href="#">{LABEL}</a> <ul>{}</ul></li>To create a new frame (which can then be later added to the navigation menu) go to the admin/nav/frame route (The Nav Frames Tab) and click the "Add Nav Frame" button
Each Frame functions as one dropdown menu. Thus for a Mega-Menu with 3 Mega-Menu-Dropdowns, you would need to create 3 frames.
The markup of a frame will reference Panes, but first we have to create them as shown in the next section.
Panes are the content for the frame and typically pull from menus created in the navigation tab.
Most frames will have multiple different panes that each pull from one or two menus in the navigation tab
Before creating a new Pane you need to create a new Pane template
Creating a Pane Template
To create a Pane Template click the + symbol next to the Pane Templates Button. Then Input the name of the frame and save (the name is purely for developer use and will not be seen by the user)
Now you can edit the pane template.
The pane tab is essentially the wrapper of the items
The variable {NAV:nav_id} will allow you to pull a menu from the navigation tab and have it display in the mega menu, and this is all that is typically necessary for the code in the Pane tab (other markup can be added as needed).
The Item tab is the markup for each individual item (Pulled from the menu).
The standard variables are listed below:
{ITEM_LINK}: The page that the item links to.
{ITEM_LABEL}: The label for the page (name of page)
{ITEM_IMAGE:size=md}: The image of the page
{ITEM_DESC:limit=100}: The Google description of the page
Note that these values can all be overridden in the meta tab of the items in the Leiout navigation tab.
An example of an item tab is shown below. It creates items with an image, description and title.
x
<div class="mega-menu-box"> <div class="mega-menu-media"> <div class="mega-menu-media-img"> <div class="mega-menu-thumbnail"> <a href="#"> <img src="{ITEM_IMAGE:size=md}" alt="thumbnail"> <span></span></a> </div> </div> <div class="mega-menu-media-info"> <h4 class="mega-menu-heading"><a href="#">{ITEM_LABEL}<span></span></a></h4> <div class="mega-menu-desc"> {ITEM_DESC:limit=100} </div> </div> </div></div>Using a Pane Template
After creating Pane templates you can use them by clicking the “Add Pane” button.
The name of the pane is again solely for the developer and will not be seen by the user.
Inside the Pane build menu, you can select the options to fill in the values of the previously mentioned variables. (You can also edit the Template via the Pane and Item tabs)
The final step for finishing a frame is creating the markup and adding the created panes to it.
This is done by clicking on the “Edit Nav Frame” button and adding the desired mark-up.
To add a pane and its content use the variable {PANE:id} with id being the numerical ID attached to the pane.
An Example of the markup is shown below:
x
<li class="mega-menu dropdown_menu"> <a href="#">{ITEM_LABEL}</a> <ul> <li> <!-- Mega menu container --> <div class="mega-menu-container"> <div class="row"> <div class="col-lg-4"> {PANE:5} </div> <div class="col-lg-4"> {PANE:6} </div> <div class="col-lg-4"> {PANE:7} </div> </div> </div> </li> </ul></li>The mega menu should now be fully functional.


This article explains how to install and use Google's translate javascript library and implement a b...

This help article explains the CSS mix-blend-mode property and how to incorporate it with hero image...

This article explains how to use the Isotope JavaScript library and shows an example of it in action...
